Customization
From our Dashboard, it's possible to customize certain visual aspects of Pluggy Connect so that you can provide your users with a more tailored, branded experience.
Below we list and explain each of these aspects.
NoteThis feature is available for the Pro subscription and also on our Free Trial.
Did you have a Free subscription? Contact us to get an upgrade!

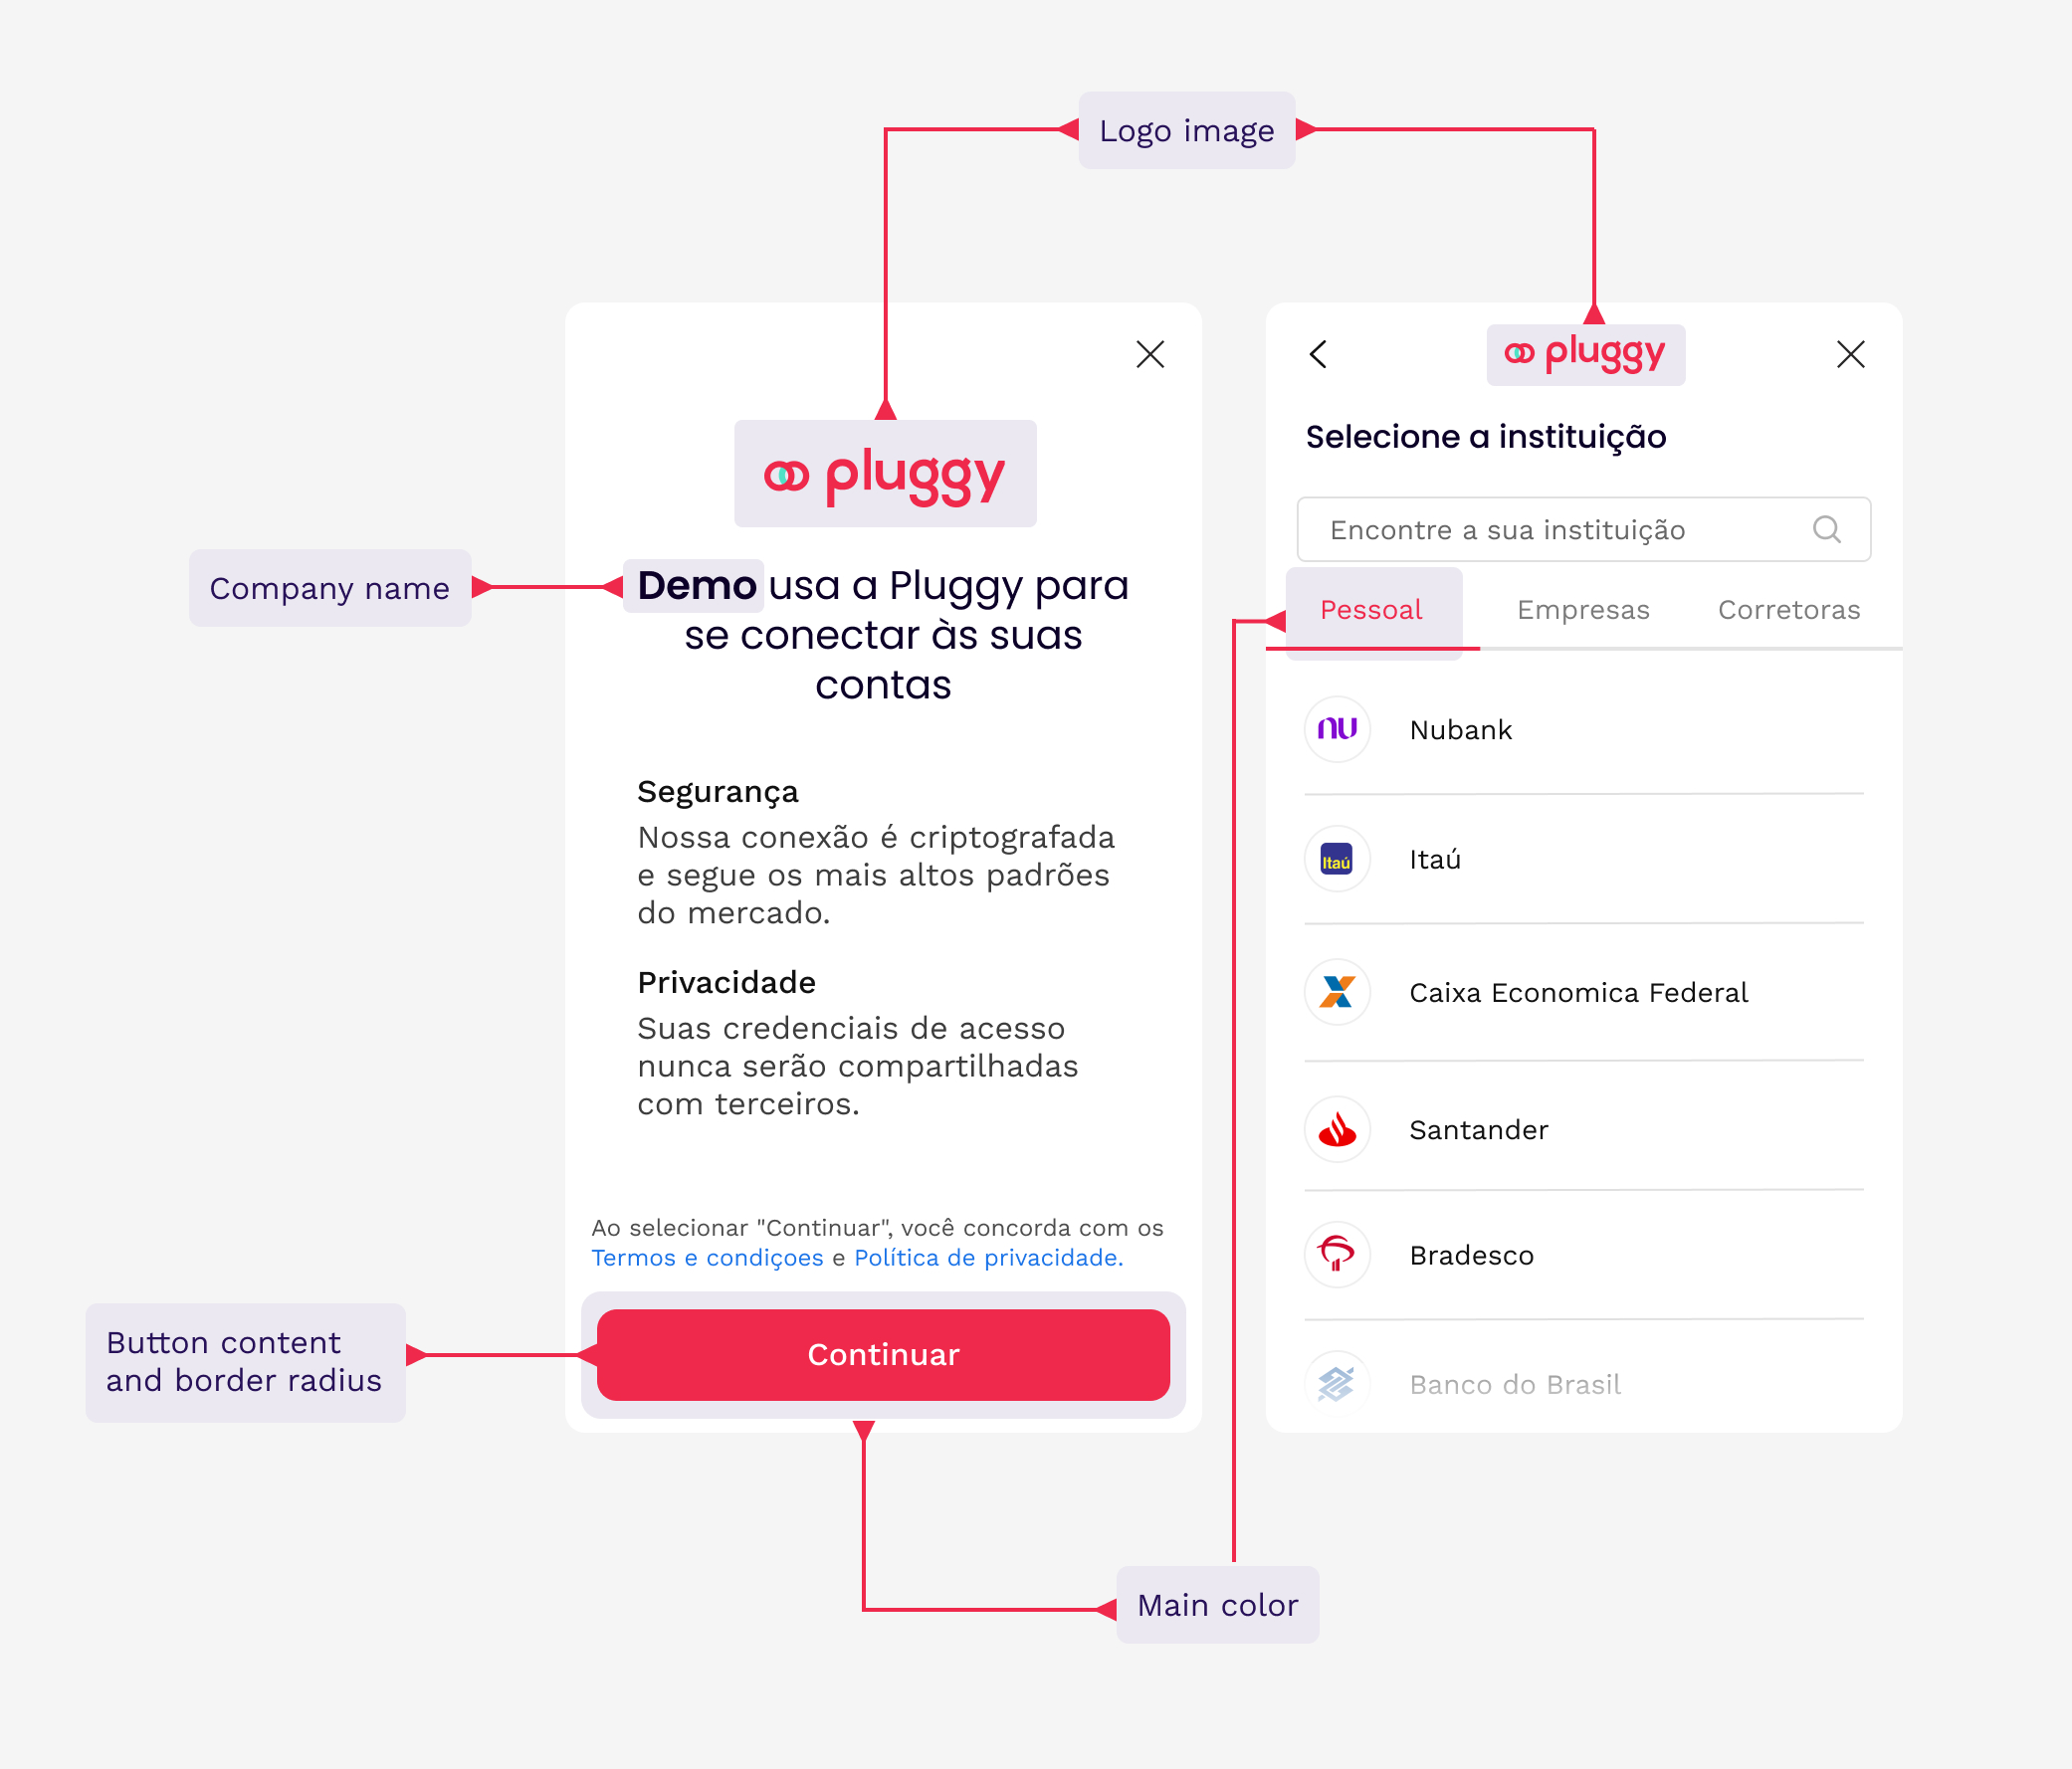
This example shows how our widget can be customized.
Company name
You can edit the text included in the first screen the user sees and thus highlight the name of your company, with a limit of 20 characters.
Logo image
Add your company logo to make Pluggy Connect more aligned with your aesthetics. You can upload the file or paste an URL with the logo image (for this, you will have to leave the image hosted on your server and paste the URL of the logo in Customization).
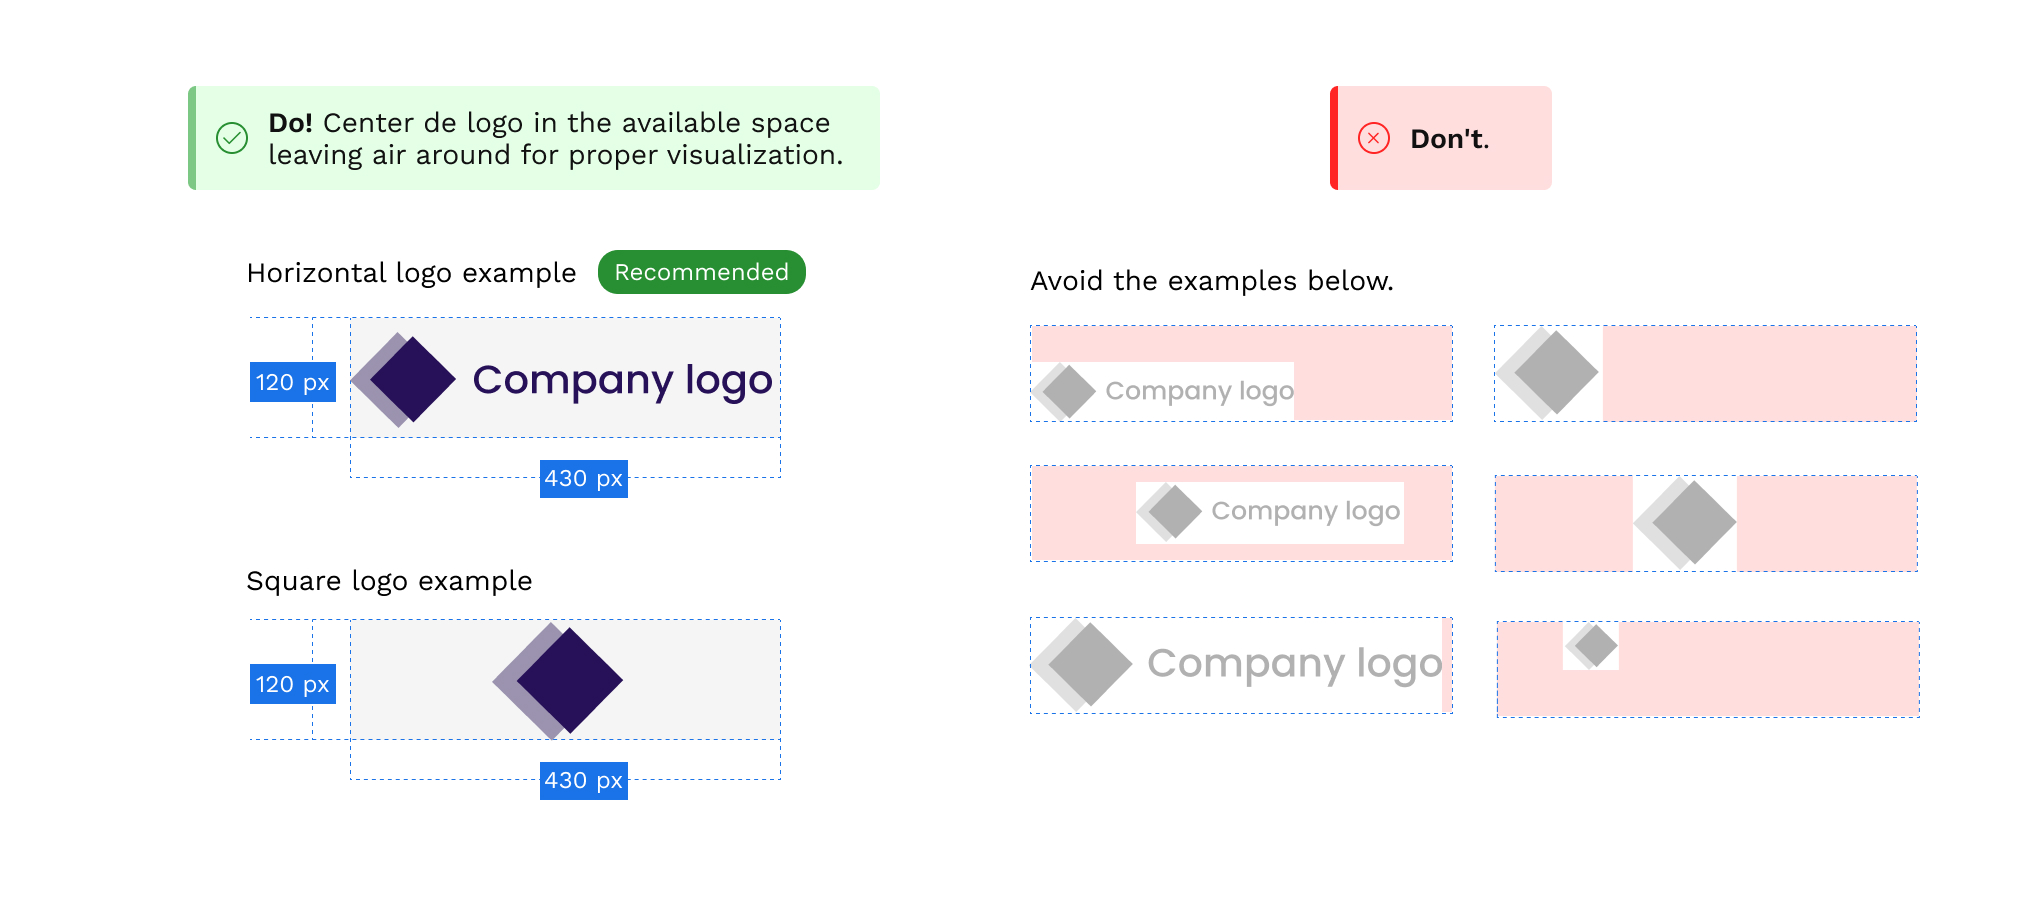
📌 Important! We recommend a horizontal format with no surrounding whitespaces for the best visibility. Also, it must have a maximum size of 430x120 px in one of the following formats: JPG or PNG.
You will see the logo on the first screen and at the top of all screens.

Primary color
The primary, main color of your brand will finish giving a special touch to your integration with Pluggy Connect, giving your users a greater sense of belonging. You will see it on the main screens and in the most relevant components such as buttons. You won't see it in the connectors connections because for those flows we take the main color of the connector in question.
Buttons
You can edit the border radius of all the buttons on Pluggy Connect widget. That would give your buttons the format you usually use in your company.
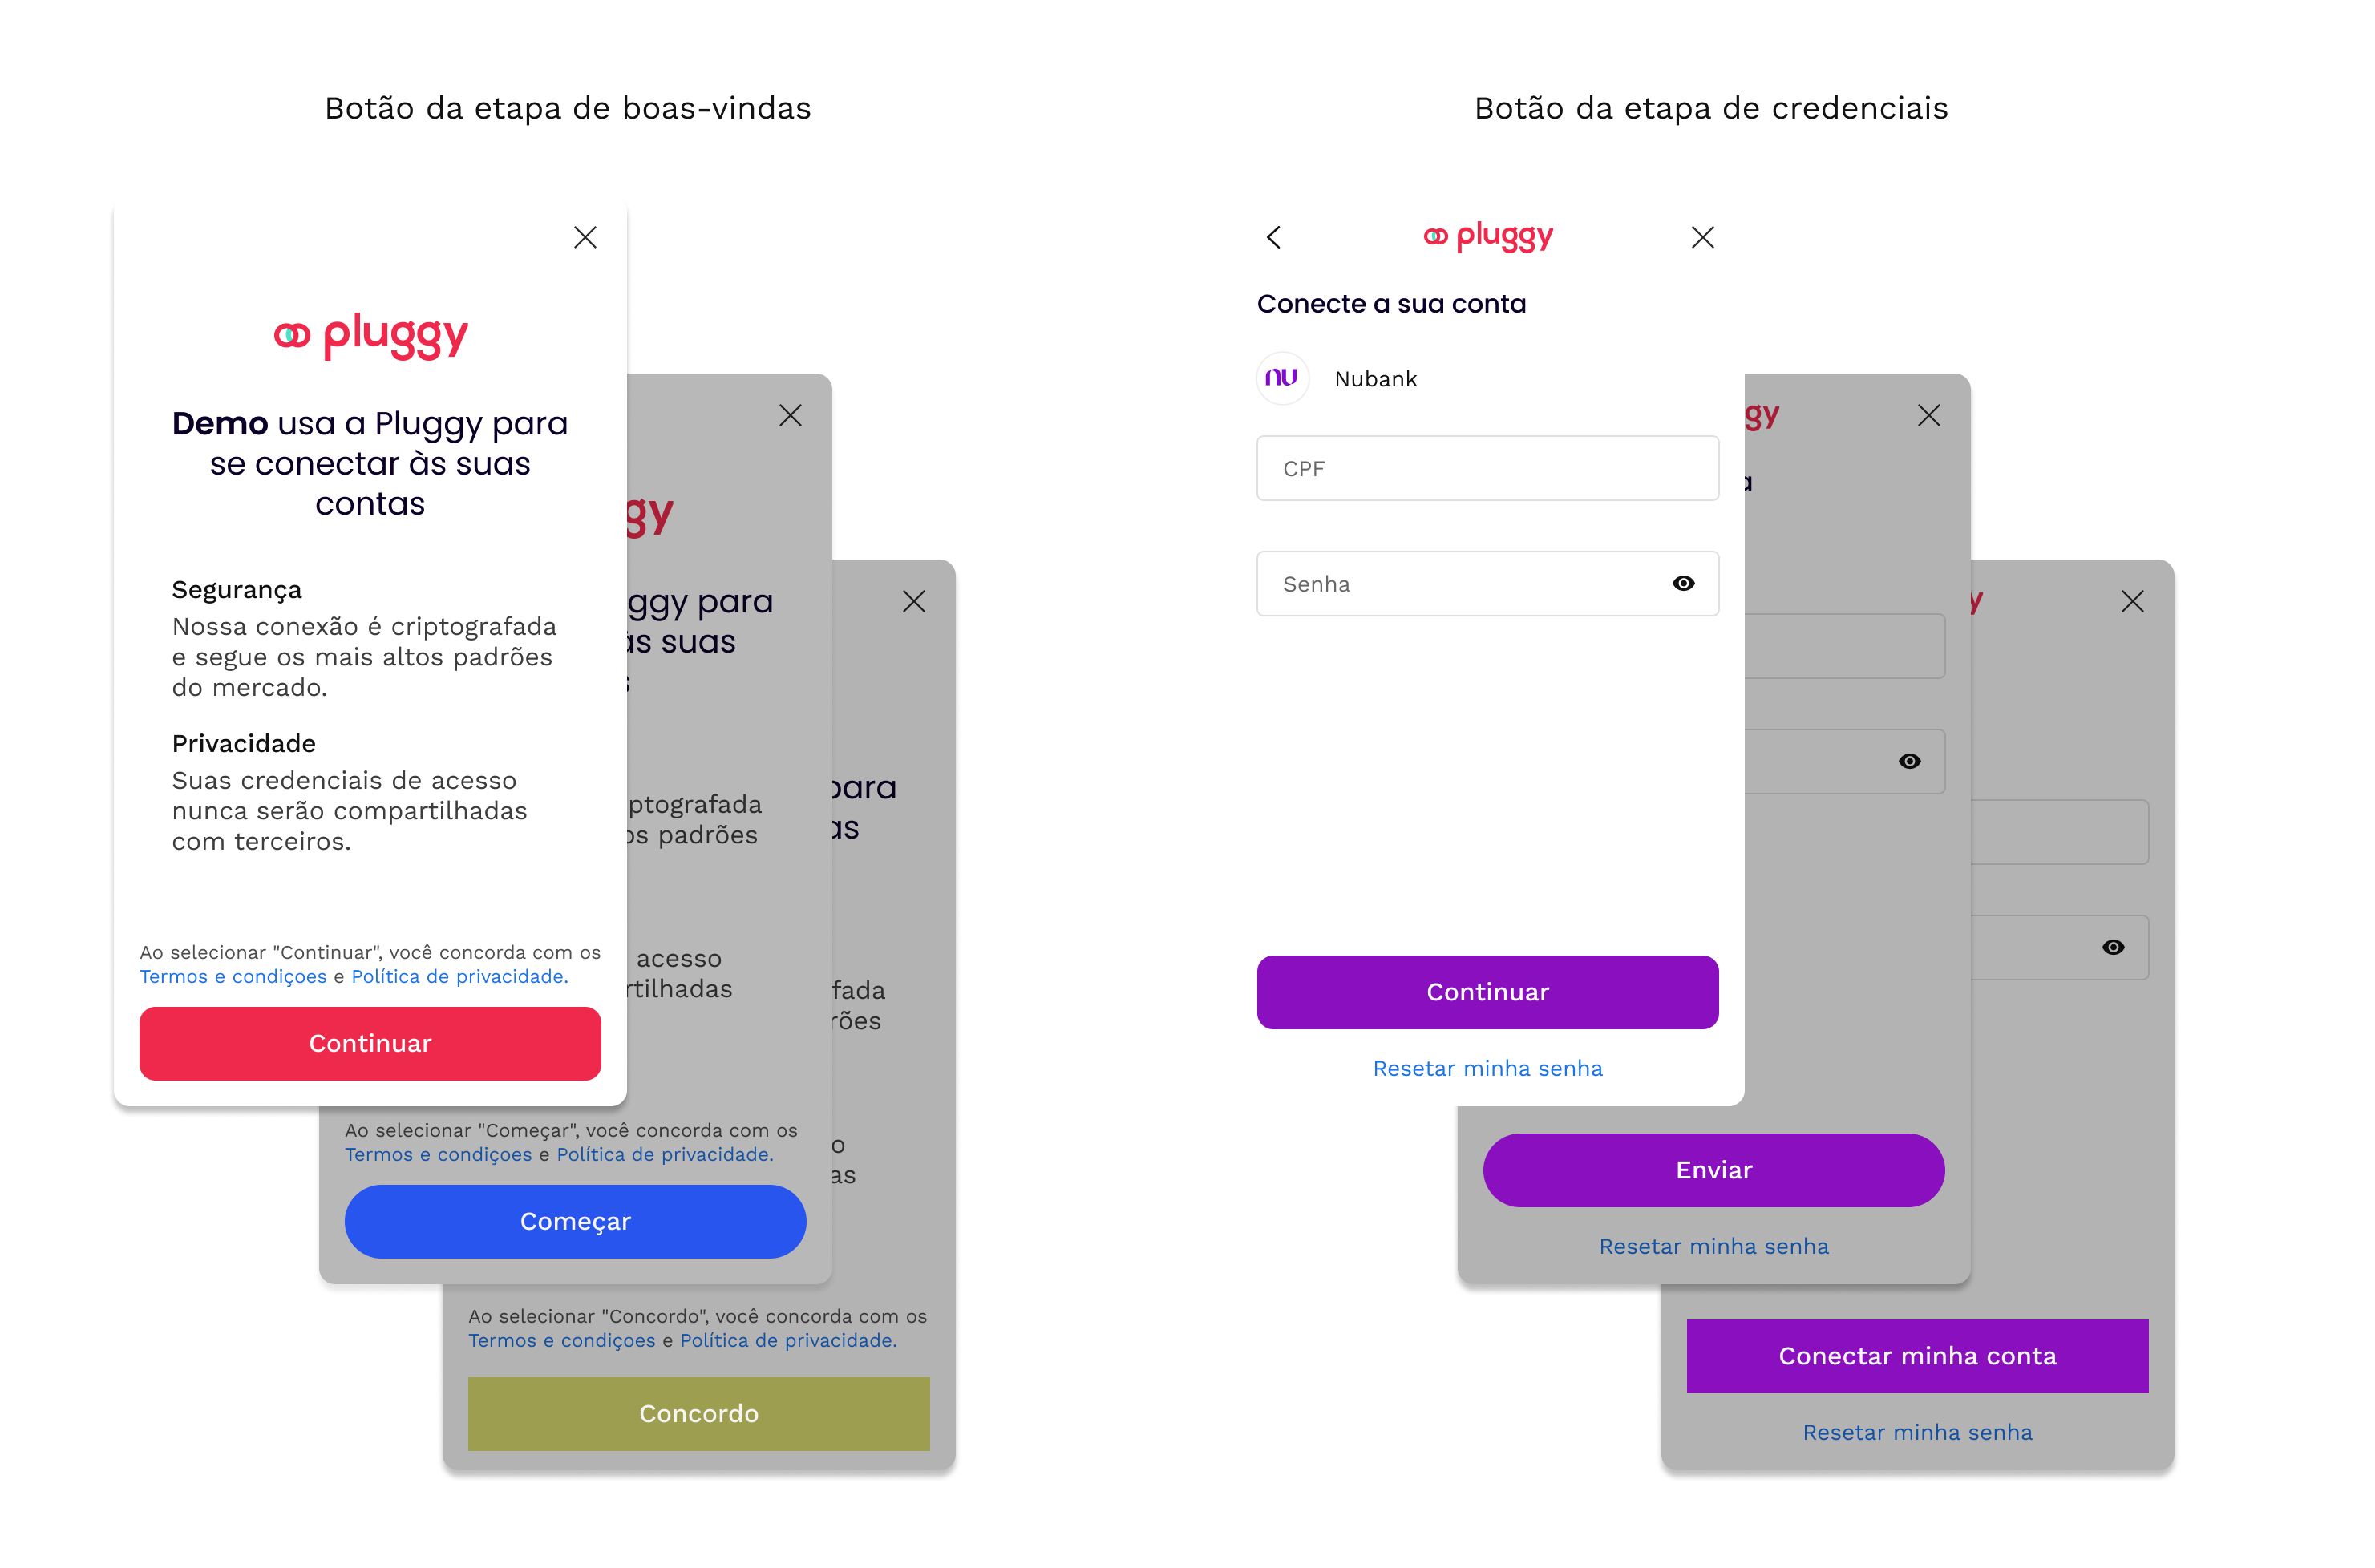
Also, you can choose the content that better suits your brand guideline by editing the first screen button or the credentials page buttons.

Connectors
You can select the connectors you want to show in Pluggy Connect. You will find them separated by type of connectors and it will allow you to easily enable and disable them.
Keep in mind that you need to always have at least one selected.
Consent
The texts of consent are those that the user sees on the first screen of Pluggy Connect under the names "Terms and Conditions of use" and "Privacy policies".
In case you need to customize them, you must contact our Sales team who will take care of reading the corresponding documents in order to validate that there are no conflicts with Pluggy, and approve them so that finally the development team can include them in your integration with Pluggy Connect.
Here is a preview so you can see how it works:
Updated 5 months ago
