Authentication
When connecting to Pluggy from a client-side application (ie. Connect Widget) we require to use a Connect Token.
The Connect Token access is limited to only the generated Item resource data (GET /items/:id), and a reduced access to the data of the recovered Accounts (GET /accounts?itemId).
So for example, a newly created Connect Token can't be used to access information that has been made previously with a different Connect Token.
For any other kind of requests, such as retrieving all the Item related products data, configuring webhooks, and more, you'll need to do server-side requests, using your API Key.
Create a Connect Token
Fistly, you'll need to authenticate with Pluggy API, using your CLIENT_ID and CLIENT_SECRET, to create an API Key.
Note that these credentials are extremelysensitive, so please ensure to do this step in your secured Server only.
This API key expires after 2 hours and will give you full access to all Pluggy API endpoints.
Then, with your API key, you'll have to make a call to POST /connect_token.
ImportantThe
connectTokenis valid for 30 minutes only.
The recommended usage is 1-per-connection, so we suggest creating a new one, each time you want to create or update an Item.
The usage of this Connect Token is identical to the API key, simply pass it in the request authentication header, Pluggy API will take care of validating its scope.
Attempts of accessing detailed products data using a Connect Token (instead of an API Key) will result in a
403 ForbiddenAPI response.
Configuring a Connect Token
When you are creating a connect token you can provide some ItemOptions that will be passed down to all items created using the same connect token.
{
  "webhookUrl": "https://example.com/webhook",
  "clientUserId": "My App UserId", // You can use this field to link an item with your user's identifier
  "oauthRedirectUrl": "https://pluggy.ai/demo",
  "avoidDuplicates": true
}
Creating an Item
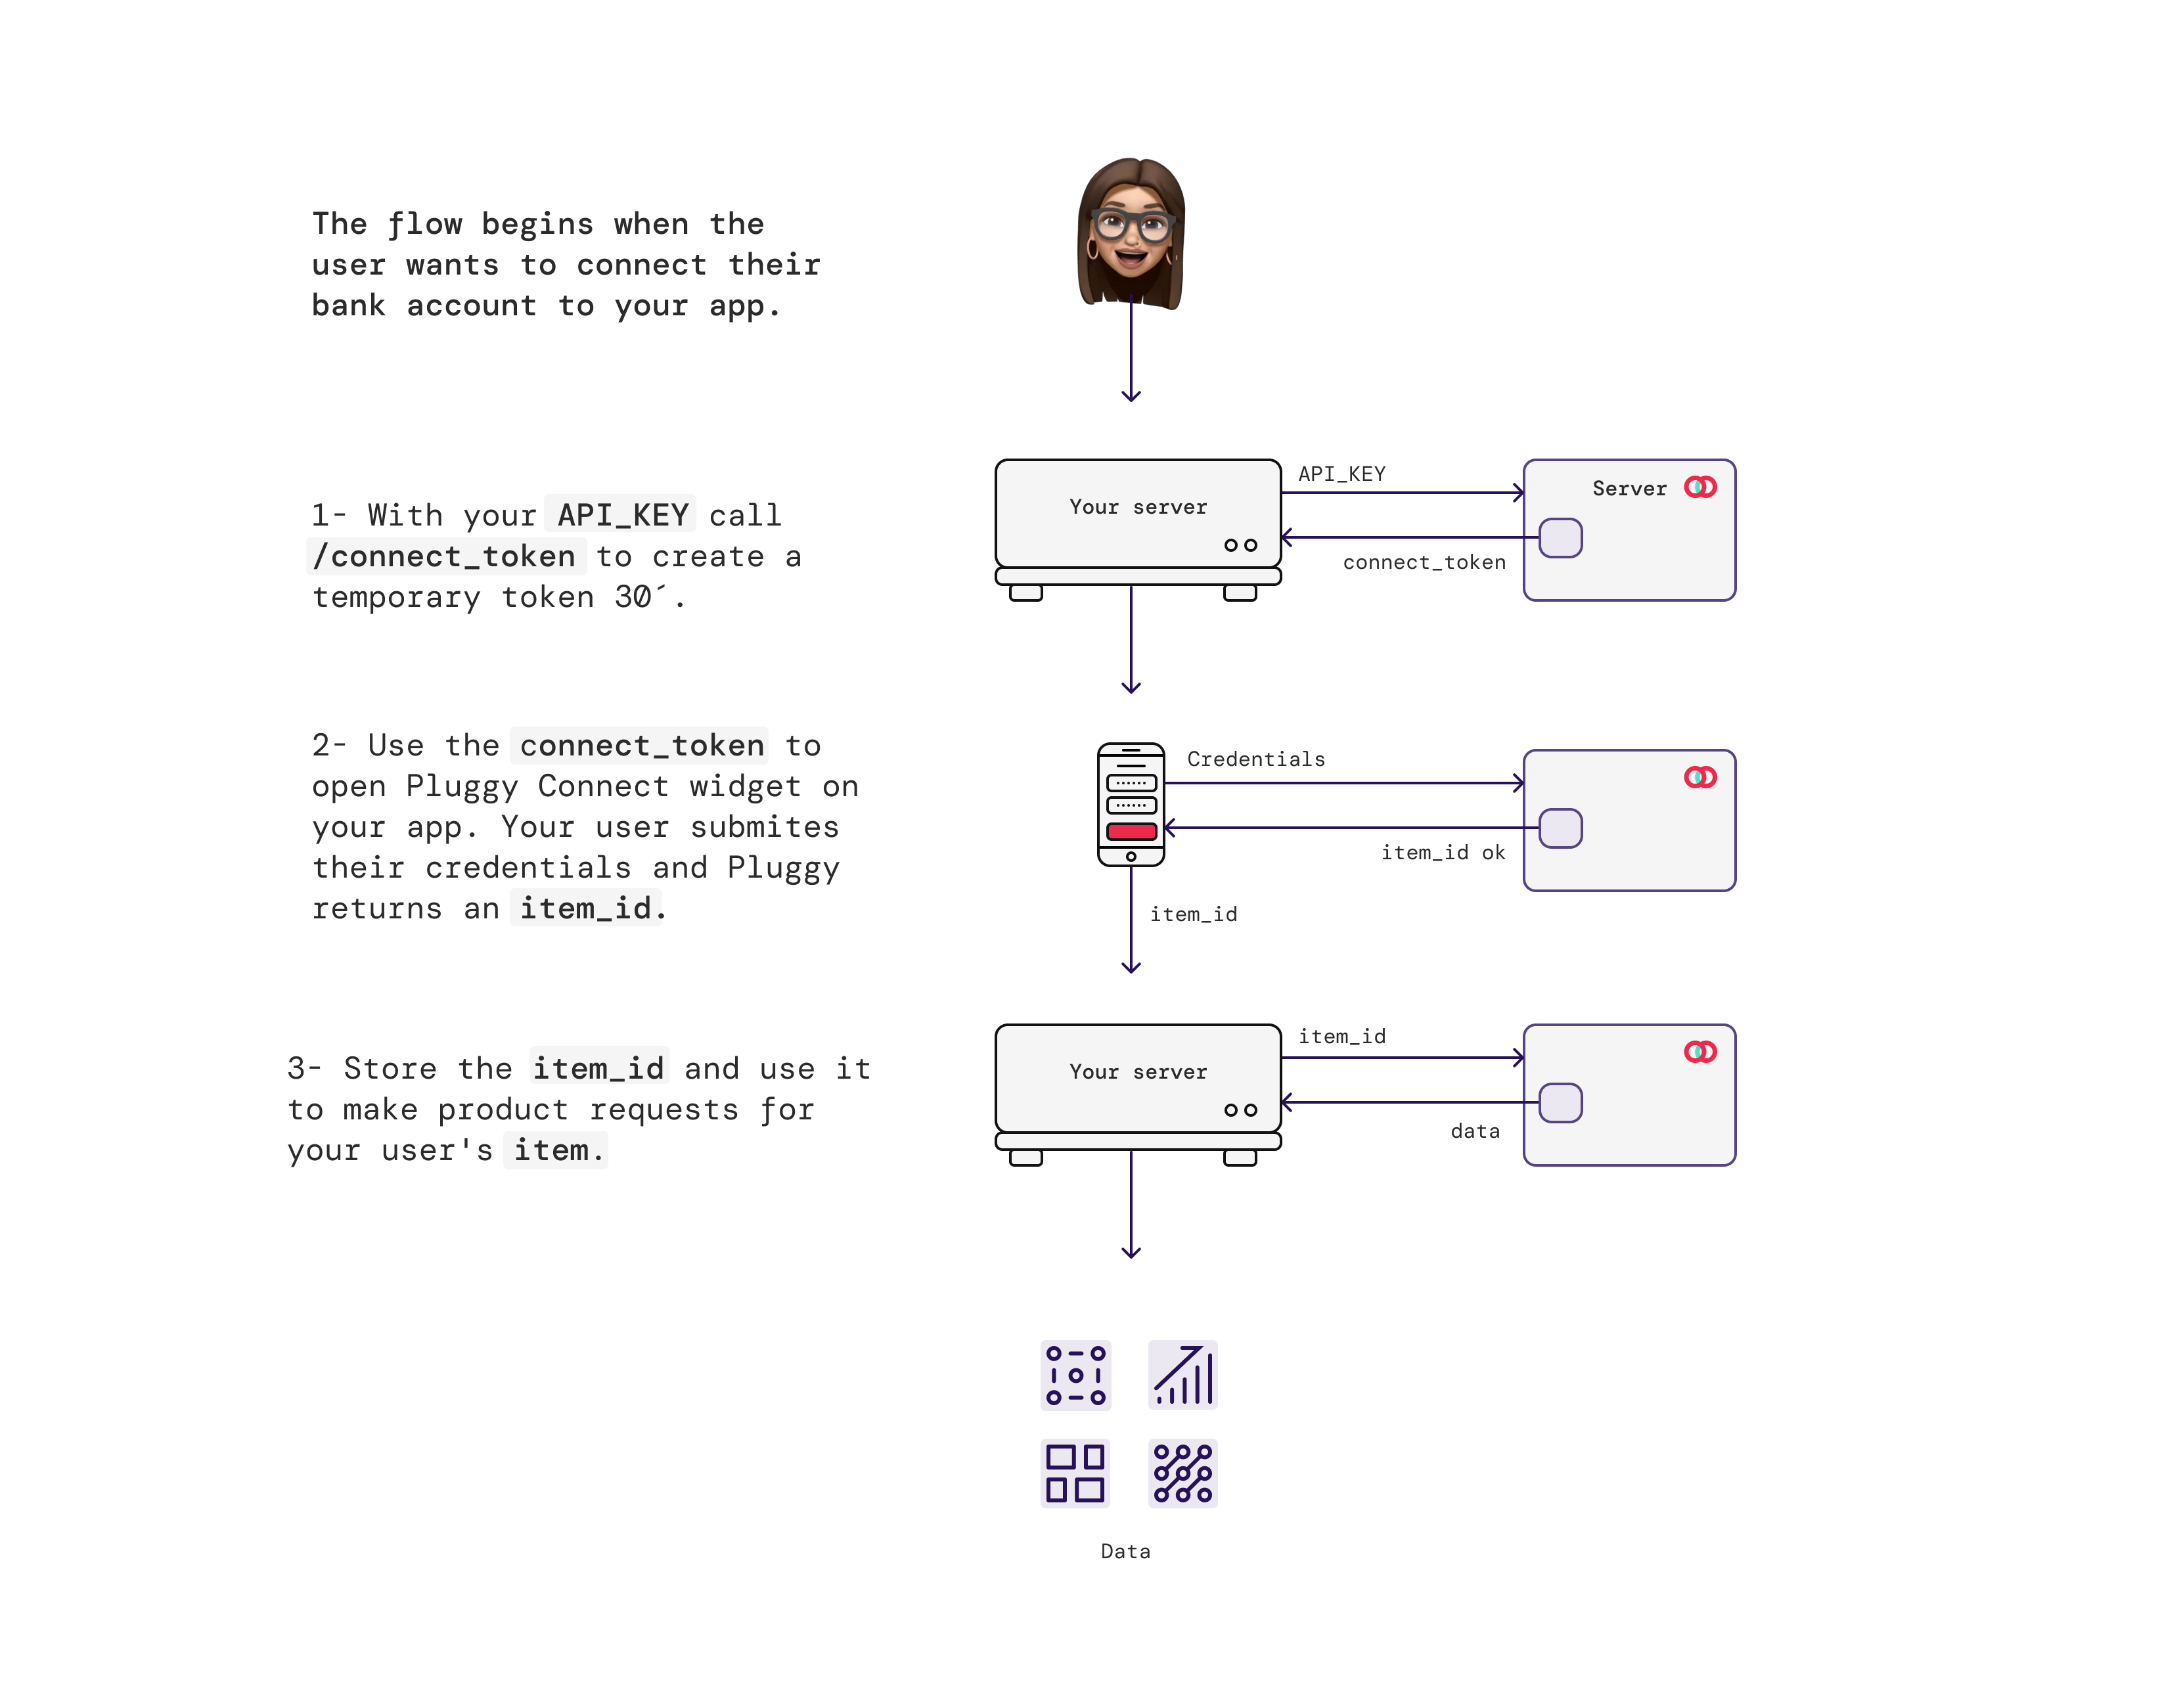
To summarize, this is an overview of the flow of how you can create an Item using a connectToken.
If you are using our Pluggy Connect widget, you'll only need to take care of providing the Connect Token - the rest will be handled by us.

Keeping a connection reference
When initializing the Pluggy Connect for your user, you may want to track from which user the connection created is from. This can be done in a few ways:
- Pluggy Connect
onSuccessevent: When the connection is created and returned, you can recover the itemId to store on your side. - Webhooks: After the item has been successfully created and synchronized, you will be receiving events.
- Linking your user identifier with an item: If you need to link the item to your user, you can store a reference on our item by using the
clientUserId. This value can be provided when creating theconnectTokenor when creating an item directly through the Items Endpoint.
Updated 5 months ago
